AI in FinTech: Exploring Its...
October 17, 2024


In brief, Spring Boot is a rigorous tool that provides the developer with the required platform to develop apps of the size and complexity required. In particular, it has hit the nail on The Head for the people who code their projects in Java. All that you need when you enter WebRTC is to discard any extra software or local downloads because it allows you to share files or talk online right away, namely to make video calls or talk without the downloading of any extra software. While web-based real-time communication can be seamlessly realized, under the hood there is a signaling server, which needs to be deployed.
This server enables work well provided the devices are connected and can talk with one another properly. The detailed guide covers ways of using Spring Boot for facilitating and Simple for the WebRTC apps.
It does quite a lot as Spring Boot is already simple to use and WebRTC can conveniently handle events taking place in real time. As a result, it can be easy for developers to create applications that work on both ended meetings or live broadcasts. If your project should be built upon multiple parts that need fast and live channels through which data should be shared, this guide through instructions about setting up a strong signaling server with the Spring Boot will show you how to accomplish that.
WebRTC stands for Web Real-Time Communication.
It is an open-source project that enables real-time communication directly between web browsers or mobile applications without the need for any plugins or additional software installations.
WebRTC provides a set of APIs and protocols that allow developers to incorporate features like voice calling, video chat, and peer-to-peer file sharing into their web applications.

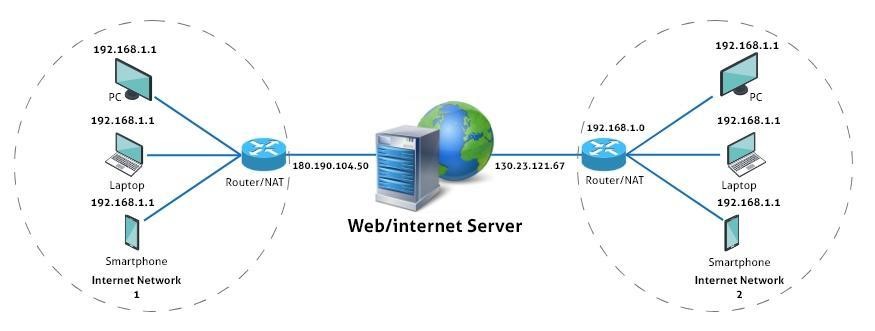
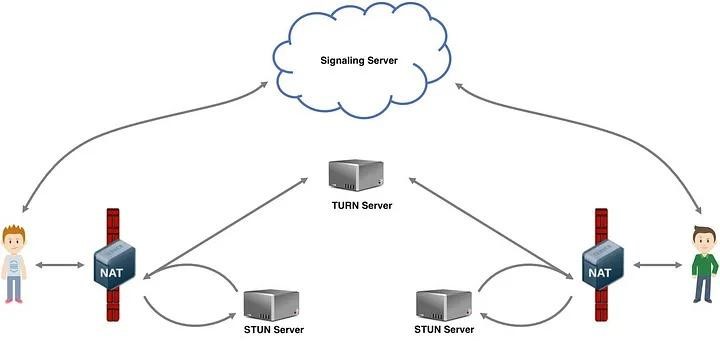
STUN (Session Traversal Utilities for NAT)

Follow below steps before running the application
1) Generate certificates:
write your local ip address of your computer/host like YOUR_LOCAL_IP = 192.168.0.166
please create an empty ssl folder under the project directory
command : mkdir ssl && openssl req -x509 -nodes -days 365 -newkey rsa:2048 -keyout ssl/private_key.pem -out ssl/certificate.pem -subj “//C=US//ST=California//L=San Francisco//O=MyOrganization//OU=MyDepartment//CN=<YOUR_LOCAL_IP>”
2) Update nginx.conf
change <YOUR_LOCAL_IP> with your local ip same as step 1
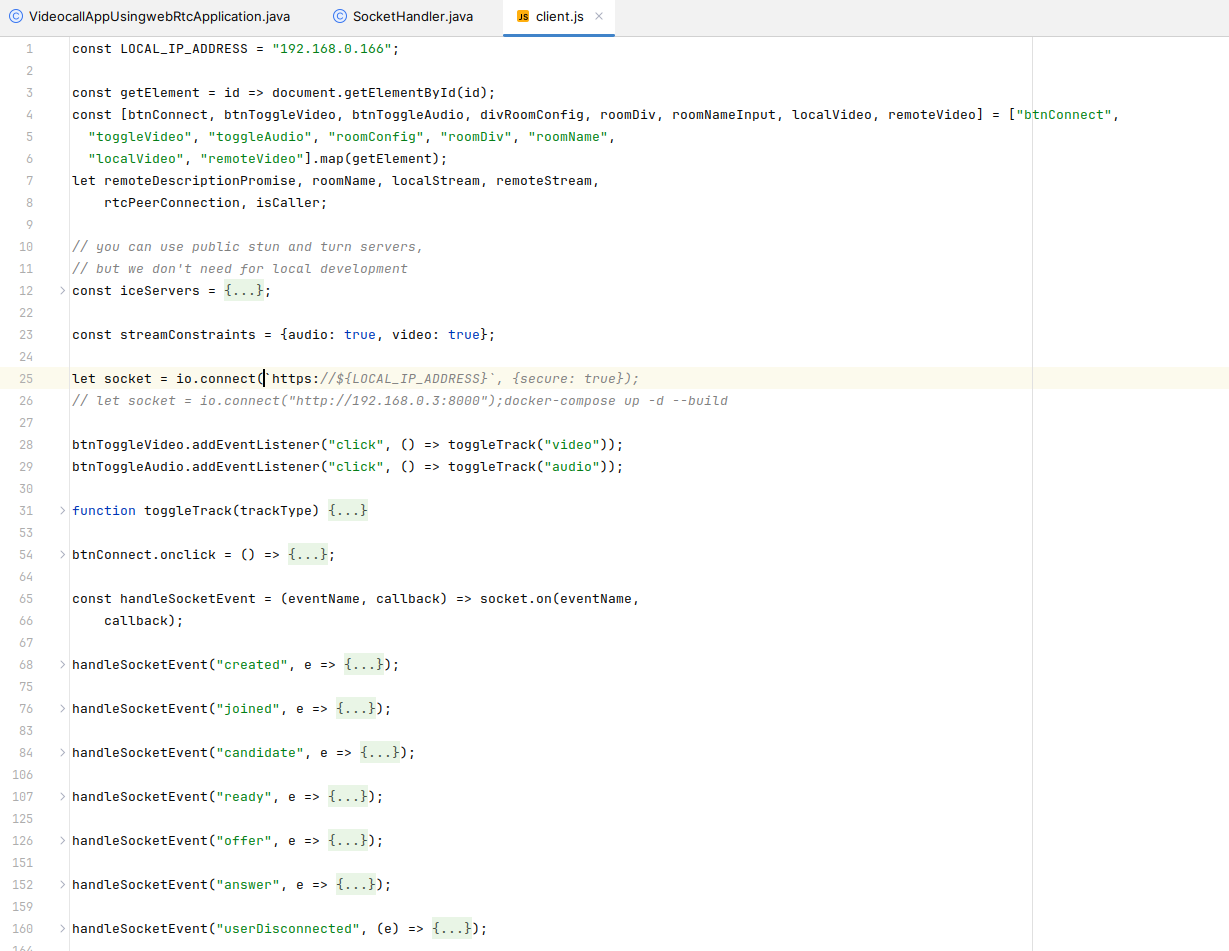
3) Update client.js file in resources
File location: src/main/resources/static/client.js
4) Build Docker Image
sudo docker-compose up -d –build
This Dockerfile defines a multi-stage build process to build and package your Java application into a Docker image.
## Build stage
FROM maven:3.9.6-amazoncorretto-17 AS build
WORKDIR /app
COPY pom.xml .
RUN mvn dependency:go-offline
COPY src/ /app/src/
RUN mvn clean package -DskipTests
# Step : Package image
FROM openjdk:17-jdk-slim
COPY –from=build /app/target/*.jar app.jar
EXPOSE 8080 8000
ENTRYPOINT [“java”, “-jar” , “app.jar”]
This NGINX configuration file defines how requests to our server should be handled, including proxying requests to our Spring Boot application and handling WebSocket connections.
server {
listen 80;
set $ip_address 192.168.0.166;
server_name localhost $ip_address;
return 301 https://$host$request_uri;
}
server {
listen 443 ssl;
set $ip_address 192.168.0.166;
server_name localhost $ip_address;
ssl_certificate /etc/nginx/ssl/certificate.pem;
ssl_certificate_key /etc/nginx/ssl/private_key.pem;
location / {
proxy_pass http://springboot:8080;
proxy_set_header Host $host;
proxy_set_header X-Real-IP $remote_addr;
proxy_set_header X-Forwarded-For $proxy_add_x_forwarded_for;
proxy_set_header X-Forwarded-Proto $scheme;
}
location /socket.io/ {
proxy_pass http://springboot:8000;
proxy_set_header Host $host;
proxy_set_header X-Real-IP $remote_addr;
proxy_set_header X-Forwarded-For $proxy_add_x_forwarded_for;
proxy_set_header X-Forwarded-Proto $scheme;
proxy_http_version 1.1;
proxy_set_header Upgrade $http_upgrade;
proxy_set_header Connection “Upgrade”;
}
}
Application.properties file
socket.host=0.0.0.0
socket.port=8000
Client.js file

Step 5: Web Socket Configuration
@Configuration
public class WebSocketConfig {
@Value(“${socket.host}”)
private String host;
@Value(“${socket.port}”)
private int port;
@Bean
public SocketIOServer socketIOServer() throws Exception {
com.corundumstudio.socketio.Configuration config =
new com.corundumstudio.socketio.Configuration();
config.setHostname(host);
config.setPort(port);
return new SocketIOServer(config);
}
}
Step 6: Web Configuration
@Configuration
public class WebConfiguration implements WebMvcConfigurer {
@Override
public void addViewControllers(ViewControllerRegistry registry) {
registry.addViewController(“/”).setViewName(“forward:/index.html”);
}
@Override
public void addCorsMappings(CorsRegistry registry) {
registry.addMapping(“/**”).allowedOriginPatterns(“*”);
}
}
Step 7: Socket Handler
public class SocketHandler {
private final SocketIOServer server;
private static final Map<String, String> users = new HashMap<>();
private static final Map<String, String> rooms = new HashMap<>();
public SocketHandler(SocketIOServer server) {
this.server = server;
server.addListeners(this);
server.start();
}
@OnConnect
public void onConnect(SocketIOClient client) {
System.out.println(“Client connected: ” + client.getSessionId());
String clientId = client.getSessionId().toString();
users.put(clientId, null);
}
@OnDisconnect
public void onDisconnect(SocketIOClient client) {
String clientId = client.getSessionId().toString();
String room = users.get(clientId);
if (!Objects.isNull(room)) {
System.out.println(String.format(“Client disconnected: %s from : %s”, clientId, room));
users.remove(clientId);
client.getNamespace().getRoomOperations(room).sendEvent(“userDisconnected”, clientId);
}
printLog(“onDisconnect”, client, room);
}
@OnEvent(“joinRoom”)
public void onJoinRoom(SocketIOClient client, String room) {
int connectedClients = server.getRoomOperations(room).getClients().size();
if (connectedClients == 0) {
client.joinRoom(room);
client.sendEvent(“created”, room);
users.put(client.getSessionId().toString(), room);
rooms.put(room, client.getSessionId().toString());
} else if (connectedClients == 1) {
client.joinRoom(room);
client.sendEvent(“joined”, room);
users.put(client.getSessionId().toString(), room);
client.sendEvent(“setCaller”, rooms.get(room));
} else {
client.sendEvent(“full”, room);
}
printLog(“onReady”, client, room);
}
@OnEvent(“ready”)
public void onReady(SocketIOClient client, String room, AckRequest ackRequest) {
client.getNamespace().getBroadcastOperations().sendEvent(“ready”, room);
printLog(“onReady”, client, room);
}
@OnEvent(“candidate”)
public void onCandidate(SocketIOClient client, Map<String, Object> payload) {
String room = (String) payload.get(“room”);
client.getNamespace().getRoomOperations(room).sendEvent(“candidate”, payload);
printLog(“onCandidate”, client, room);
}
@OnEvent(“offer”)
public void onOffer(SocketIOClient client, Map<String, Object> payload) {
String room = (String) payload.get(“room”);
Object sdp = payload.get(“sdp”);
client.getNamespace().getRoomOperations(room).sendEvent(“offer”, sdp);
printLog(“onOffer”, client, room);
}
@OnEvent(“answer”)
public void onAnswer(SocketIOClient client, Map<String, Object> payload) {
String room = (String) payload.get(“room”);
Object sdp = payload.get(“sdp”);
client.getNamespace().getRoomOperations(room).sendEvent(“answer”, sdp);
printLog(“onAnswer”, client, room);
}
@OnEvent(“leaveRoom”)
public void onLeaveRoom(SocketIOClient client, String room) {
client.leaveRoom(room);
printLog(“onLeaveRoom”, client, room);
}
private static void printLog(String header, SocketIOClient client, String room) {
if (room == null) return;
int size = 0;
try {
size = client.getNamespace().getRoomOperations(room).getClients().size();
} catch (Exception e) {
log.error(“error “, e);
}
log.info(“#ConncetedClients – {} => room: {}, count: {}”, header, room, size);
}
}
Step 8: Build Your Docker image
sudo docker-compose up -d –build
Spring Boot is a great tool for making WebRTC signaling servers, which help in running live communication apps like chat and video calls. It gives developers lots of tools to build strong, growable, and live chat applications easily and quickly.
Spring Boot makes the whole process of building these apps much simpler, thanks to its big collection of Spring tools. This is great for both beginners and experienced developers who want to make anything from chat apps to video conference systems.
If you or your company wants to start or improve your live communication apps, working with a Java Development Company that knows a lot about Spring Boot and WebRTC can be a big help. They can guide you through the tricky parts of making these apps work well in real time.
This kind of teamwork not only speeds up making good-quality apps but also makes sure that your tech projects help your business, taking full advantage of what WebRTC can do with the help and flexibility of Spring Boot.
Github Link :
https://github.com/UtsavDabhi16/video-call-webRTC-websocket