Overview
Bit stands at the intersection between product and engineering. Bit allows you to identify a section of your code as a component and treat it independently from the rest of your project. It will enable you to create components and compose them with each other. They can be of different kinds like apps, pages, UI components, backend services, and even content.
Goals
- Avoid unnecessary amounts of duplicated code, and create reusable code.
- Simplify the sharing process since you don’t have to set up a separate repo and rework the way you import those files into your project.
Features:
- Component source-control = Essentially, git but for components
- Isolated component development = Includes isolated rendering, tests and builds,
- Component dependency graphs = Includes two types of dependencies, node packages and other components
Create workspace
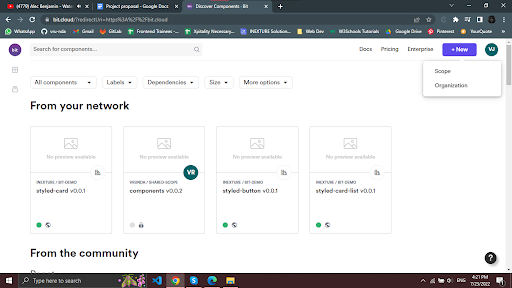
The first step in the Bit journey is to initiate a new Bit workspace. It is a development workspace for distributed, component-driven software. Log in to your bit.cloud account. Create a scope or organization.

Installation
First, you need to install the bvm in your global environment. Next, install bit with the using bvm install command and make sure to install the latest version.
If you get a warning or the bvm command is not available you will need to run the code below.
echo 'export PATH=$HOME/bin:$PATH' >> ~/.bashrc && source ~/.bashrc
Authenticate bit
In the next step, you need to authenticate the bit. Log in with your bit account. This will open a window in your browser where you’ll have to log in to your bit account. This will generate a token and add it to your global .npmrc file located in your home directory. Make sure it’s configured correctly.
Creating bit components from an existing project
If you are creating bit components from an existing project then First, initialize bit harmony workspace. Bit creates the following files when initializing a new workspace:
- workspace.jsonc – The workspace configuration file that sets rules and policies for the workspace and all its components.You need configure the file to apply the React development environment on all components to your workspace, and to change the default scope to your remote scope. You can refer this section
- .bitmap – An auto-generated mapping between tracked components in the workspace and their physical location on the file system. The file structure of your workspace is entirely up to you.
- .git/bit (hidden directory) – Your local scope. Where your workspace’s component release versions are stored.
Start configuring the workspace.jsonc file. Create the components you need to share across multiple projects. I’ve created the components/hooks and components/ui.
The bit commands are pretty much the same as git. You need to stage the components and then add a meaningful commit to create a snapshot of the staged changes. The Bit harmony doesn’t allow adding of individual files instead it uses directories. So if you try to add single files, it will give you the following error.

You can avoid this from happening by creating a main file and using all the other files there, Or you can create an individual directory for each component with its required files and use bit add with path to stage them. After that you need to compile the code. You can use the bit status command and bit install command which serve the same purpose as they do in git.

Export the components in the below mentioned format:
bit export company.scope OR bit export //if you have default scope configured
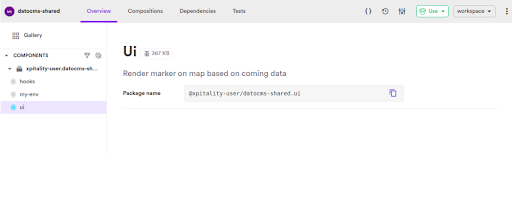
You can see your exported components after you start the bit server with bit start command. You’ll be prompted with a window of bit cloud as shown here:

Installing bit components with npm
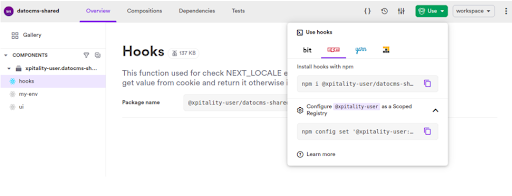
To start installing and using bit components you need to configure your npm registry to bit. To do that, set the username for npm to the scoped registry. You can find that by clicking on the use option as shown below:

This will set your remote scope registry in your .npmrc file. And now you can install the component by copy-pasting the command from the prompt and use them just as any npm package.
Using Tailwind with bit
To use Tailwind CSS with the bit we use something that uses named environment variables. Environments provide templates to get started quickly with composing on top of them. To see a list of available templates bit template. Here, we are creating a basic environment that composes one of the base environments. The template generates the following structure:

You want to change the file structure of the env folder using the command bit move <existing-dir> <new-dir>
In our custom env component, after the standard tailwind configuration is done all you need to do is, install the TailwindCSS webpack transformer component from Bit. After the installment import the transformer component and use it in the main.runtime.ts file.
You can use envs.compose file to override files for TypScript, webpack, Jest, etc. You can configure webpack so you can use the TailwindPreview and DevServer Transformers. The CSS file you create is imported in the preview.runtime.ts file. Once you apply any change, you can tag the first version of your component and export it.
Note: Make sure postcss has been installed and is in your workspace.json. If not, just install it with the bit.
Apply the environment to component
You can apply the environment to all your components or a set of components via the command: bit env set <pattern or component_id> <compnay.scope/my-env>
You can find the command for your env component in the bit cloud tab.
Alternatively, under the variant section of your workspace.json file choose which components you want to have the custom environment set. Validate that the environment is set for the component by running the show command for the component.
Conclusion:
We demonstrated how to create and share the reusable React components using bit harmony. First, we created the workspace, installed the Bit CLI tool globally, set the npm registry and pulled in the components we added to the workspace. We have also added the configuration to support Tailwind CSS.
You can use bit.dev to implement the shared react components in your team’s code too, so different developers can share and sync it across your different projects and applications.
Feel free to explore components in the bit.dev community or use Bit to make your own components reusable.


